Making Cheese with Kids: Queso Blanco
Become a scientist in your own kitchen! Making cheese is a simple chemical process that doesn’t require a lot of fancy equipment. Try it for yourself with this recipe for queso blanco, a mild Mexican cheese.
The earliest cheese makers had to do everything themselves, even make their own equipment from whatever materials they had on hand. Some cheese makers still use traditional supplies, such as clay pots with holes for draining curds and woven baskets for molds. These days, using modern equipment made from stainless steel and food-grade plastic is a better option to improve your chances of success making cheese at home. If you don’t already have the cooking gear described below, you can buy most of it from a regular kitchenware or grocery store.
Tools of the Trade
Cheese Pot
A 5- to 6-quart pot is large enough to make most of the cheeses in Say Cheese!, including queso blanco (recipe follows).
Because you will be working with acidic liquids, the pot needs to be made from a material that does not react to acids. Stainless steel, heatproof glass, and enamel (be sure there are no chips in the surface) are all great options for cheese making. A pot with a thick bottom will hold the temperature better than one with a thin bottom.
Measuring Cup and Spoons
A 1-cup measuring cup is all you need for cheese making. The best material for a measuring cup is glass because it lets you see what you are measuring and it is easy to clean and sterilize. For spoons, stainless steel is the easiest material to clean and sterilize.
Colander and Large Bowl
When making cheese at home, you’ll be draining your curds in a colander lined with cheesecloth or butter muslin.
Stainless steel, enamel, and plastic are all fine to use, but, again, avoid reactive metals such as aluminum. The bowl needs to be a bit larger than the colander to allow the whey to collect at the bottom without touching the curds.
Butter Muslin
You may have heard of cheesecloth — a woven cotton material used for draining curds and for lining molds when you are pressing hard cheeses. Butter muslin has a tighter weave and is used for draining all soft cheeses and yogurts.
You can buy both types from a cheese-making supply store, from various online suppliers, or even at a local fabric store. They can be washed and reused.
Dairy Thermometer
A dairy thermometer is vital when making cheese because it gives a full range of temperatures from 0°F to 220°F (-18°C to 104°C). Candy thermometers don’t work because they start at too high a temperature. You can find a dairy thermometer at the grocery store in the gadget aisle. One that clips to the side of the pot is handy, but a digital version is also easy to use.
Slotted Spoon
You’ll need a long-handled stainless steel spoon or ladle to stir ingredients into your milk and to ladle the curds out of the pot after they are set.
Now you’re ready to make your very own cheese at home! When you do, you’ll be joining the special club of cheese makers who for thousands of years have been creating this amazing food. Not only will you end up with something you can eat and share, but the process of working in the kitchen can be a lot of fun.

Queso blanco
Queso blanco (say KAY-so BLAHN-koh) means “white cheese” in Spanish. This tasty white cheese from Mexico is traditionally made with cow’s milk and usually eaten fresh. This cheese holds together like a firm tofu and can be cut into cubes for cooking. Milks with lower fat content create a slightly crumbly but equally delicious version.
Makes approximately 1½ pounds
Ingredients
Ingredients
- 1 gallon whole milk (not ultra-pasteurized)
- ¼ cup apple cider vinegar
Equipment
- 5- to 6-quart pot
- Dairy thermometer
- Measuring cup
- Slotted spoon
- Colander
- Butter muslin
- Rimmed tray or large bowl for draining
- Small plate
- Large jar
- 1-quart glass storage container
Directions
After using the ice cube trick (see Note below), pour the milk into the pot, and heat over medium heat to 190°F (88°C). When the milk is at the correct temperature, add the vinegar and slowly stir to blend it in without touching the bottom of the pot. Usually curds form within a minute — when they do, remove the pot from the heat.
Continue stirring gently until you see the clear separation of curds and whey. If you don’t see curds forming, bring the temperature up to 200°F (93°C). If curds are still not forming, add extra vinegar 1 teaspoon at a time, stirring gently after each addition, up to 2 tablespoons.
Line a large colander with butter muslin, letting the cloth hang over the sides, and put the colander on a rimmed tray or into a bowl for draining. Transfer the curds into the lined colander.
Gather the corners of the muslin and twist them together to form a tight ball. Careful — the curds will be hot!
Put a plate and a jar filled with 2 to 3 quarts of water on the bundle of curds and let drain for 2 to 3 hours, or until the curds are nicely consolidated.
Store in a covered container in the refrigerator for up to 10 days. The cheese will become firmer when chilled.
The Ice Cube Trick:
Before adding your milk to the pot, put an ice cube into it and roll it around until the bottom of the pot feels cold to the touch from the outside. This creates a liquid barrier that prevents a burned mess and helps with cleanup. It also allows you to do less stirring, which is helpful because the stirring motion can break down the proteins in the milk and give you a lower yield on your cheese.
Fried Queso Blanco
Ingredients
- 1 batch queso blanco
- 2–3 tablespoons high-heat oil, such as safflower
- 1–2 cloves garlic, chopped
- 1 teaspoon tamari or soy sauce
- 1 tablespoon herbes de Provence
Directions
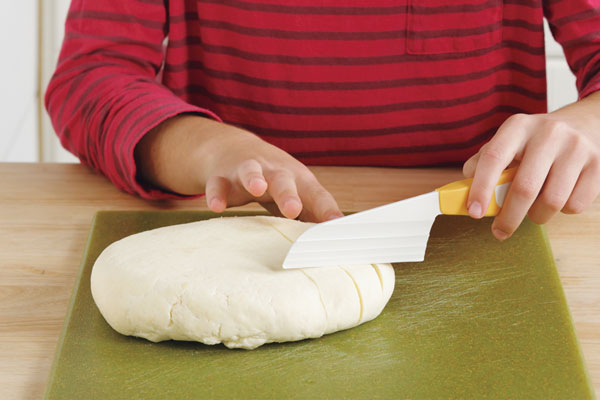
Cut the queso blanco into 1-inch chunks.
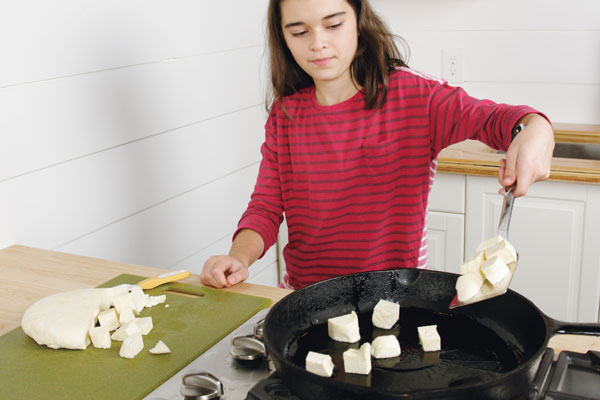
Heat the oil in a frying pan over medium heat. Toss in the chunks and stir to coat with the oil. Cook until golden.
Add the garlic and tamari to the pan and sprinkle on the herbes de Provence. Stir the cubes to coat with the seasonings. Continue to stir and cook until the cubes are golden brown.
Eat right away as a delicious snack or toss them onto a veggie stir-fry. Experiment with other seasonings. Try cutting the cheese into slices before frying, then eat them topped with salsa!
Text and recipes excerpted from Say Cheese! © 2018 by Ricki Carroll and Sarah Carroll. All rights reserved.


