Building the Best Nest Box for Your Chicken Coop
For effortless egg collection from your backyard chickens, think outside the coop! A space-saving exterior nest box can benefit you and your hens.
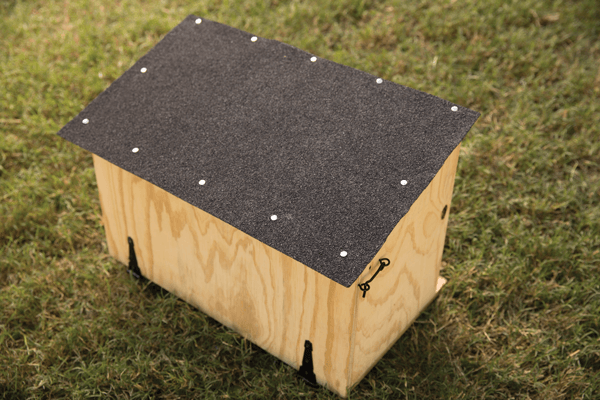
Many chicken-keepers mount nest boxes inside the coop, either set on the floor or attached to an inside wall. This is one valid option, with at least three downsides. The top of the nest box offers a surface on which chickens can roost and deposit poop all night (one more surface for you to clean). The coop must be big enough for you to enter (more time and money). Then when you do enter the coop to gather eggs, you get your shoes all poopy before you walk back to the house to cook an omelet (say no more).
Therefore, whoever came up with the idea of putting nest boxes on the outside of a chicken coop should get a medal. And a pension. And a monument on the National Mall. It’s a great time-saver.
A nest box on an exterior wall of the coop — a wall that is also outside the pen — lets you pop out your back door to gather eggs in slippers, bare feet, or your best shoes without getting filthy. My wife, Chris, and I both keep a pair of muck boots by the back door to wear on the rare occasions when we enter the pen to deal with the feeder or waterer, but we don’t have to slip them on and off for our more frequent excursions to gather fresh eggs.
An exterior nest box also enabled us to build a smaller, less expensive chicken-scale coop. Think about the cumulative time and aggravation saved over years and years by not opening the coop door or pen gate (“Don’t you girls sneak past me now!”) each time you simply want to gather eggs. Finally, if the nest box is protruding from an exterior coop wall, the hens can’t roost on it.
The Hatch
Before building our coop, Chris and I attended many coop tours and scoured many books and websites. When exterior nest boxes showed up, nearly all provided access through the roof of the box, which was hinged like a toolbox lid. Most of these henkeepers acknowledged that rain often leaked through the hinged edge of the roof lid where it met the wall of the coop.
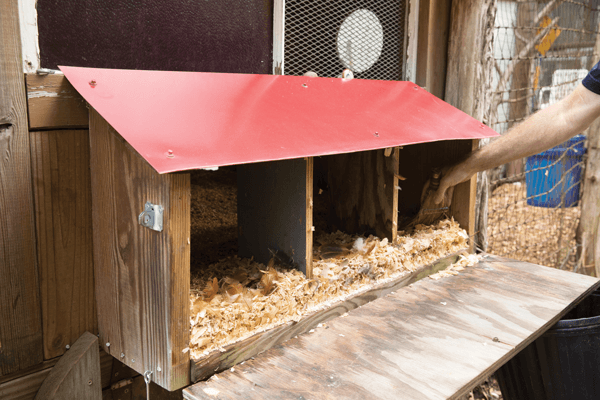
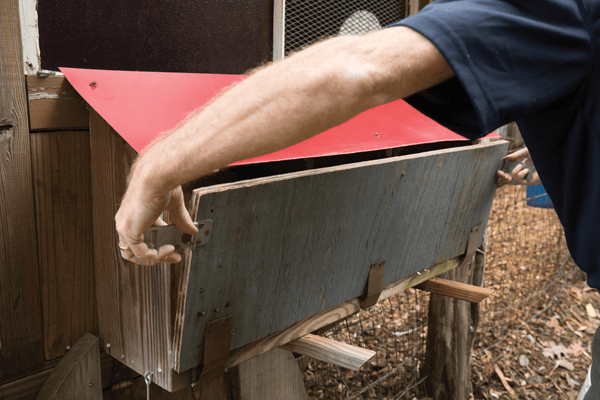
One henkeeper, however, placed the hinges on the bottom edge of the outer wall of her nest box so that it opened like a breadbox. I still recall how excited I was when I saw this simple yet remarkable improvement. I’ve taken to calling that kind of hinged wall a hatch. (Appropriate for hens, no?)
This arrangement keeps the hatch secure against drafts and critters. When Chris and I want to collect eggs or clean the nest boxes, we have easy access and good visibility into the coop.
Four Ways a Hatch Is Better than a Hinged Roof
The hatch has at least four great advantages over a hinged roof lid:
- Rain doesn’t leak in at the point where the nest-box roof meets the coop wall.
- Kids and shorter henkeepers can see into the nest box to gather eggs, whereas they’d need a stepladder to reach down through a roof lid.
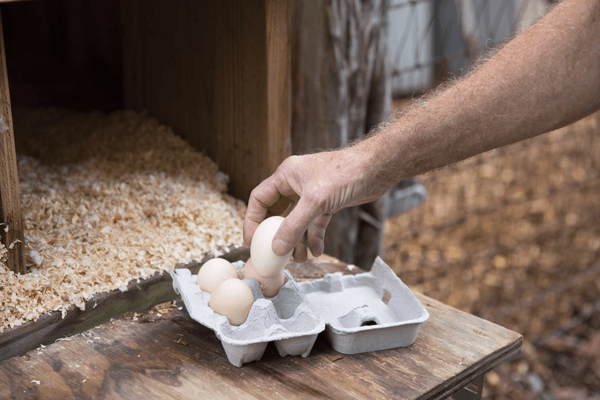
- With a swiveling support arm that swings out from under the nest box floor, this hatch also becomes a flat counter where you can set your egg carton while you gather eggs with both hands.
- This arrangement also makes cleanup faster. With the hatch open and hanging down, use a whisk broom to sweep spent bedding straight out of the nest boxes and into a container, or onto the ground to decompose.
More Design Considerations
Support System
For the hatch to form a counterlike surface when it’s open, you’ll need a wooden arm that will swing out under it for support. I use scrap pieces of 2 × 2s, but any dimension will do.
The Right Height for You — and Your Helpers
We attached our nest box to the coop so that its bottom is hip-high for me and chest-high or head-high for neighborhood kids: in other words, the floors should be is 18″ to 36″ from the ground. At this height children can help sweep the nest boxes clean, gather eggs unassisted, or even meet a chicken face to face.
Tools and Materials
- Wood. Our nest box is built of plywood that is ¾ inch thick. You can use thicker wood, such as 2 x 4s, but I wouldn’t go thinner than ¾ inch. You need that much thickness to minimize twisting as the wood dries, and to allow you to set a screw securely into the edge of each piece.
- A saw. Make your cuts with a circular saw if you want to be fast, a table saw if you want to be accurate, a jigsaw if you want to be quiet, or a handsaw if you want to get strong.
- Fasteners. Screws will hold things together better than nails. Nails can pull out due to the parts they hold twisting, or from the shrinking and swelling of damp wood. But screws will hold their place because the threads are deeply embedded. And if you need to move the coop or want to enhance the nest box, screws will let you take it apart without butchering it.
- Roofing. Since the nest box protrudes from the wall of the coop, it will need its own waterproof roof. I used a piece of shiny red scrap metal, but other roofing options will work too: asphalt shingles, cedar shingles, old license plates, flattened number 10 cans, a miniature “green roof,” and so on. Think of the nest-box roof as a small-scale but highly visible opportunity to dress up the coop and give it some charm and personality.
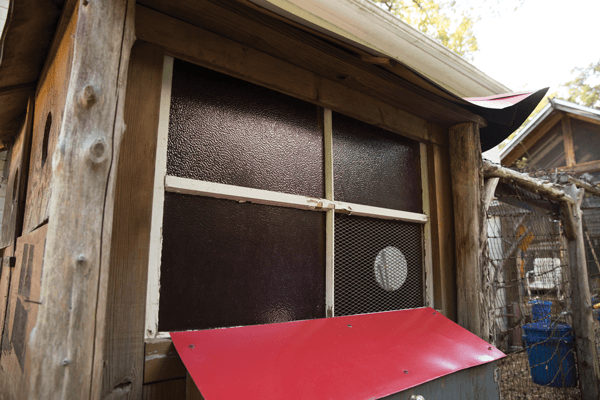
- Hinges. The hatch for our nest box has hinges at the bottom and latches on the sides. You could use gate hinges from the hardware store; choose ones that are made for outdoor use and won’t get rusty. Make sure the screws aren’t so long that they poke inside the box.
- Critterproof latches. When deciding on the latches for the external nest box on our coop, I tried to answer the henkeeper’s eternal question: “Are these latches going to be safe enough?” That can also be translated as “What will my wife do to me if critters get her chickens?” I checked the various chicken chat rooms online and found that a lot of people worried about raccoons getting into their coop. Some had lost so many hens that they were using combination locks to secure the doors. (I guess having that black mask doesn’t qualify a raccoon as a safecracker.) I think carabiners are tricky enough to keep raccoons out. I put a store-bought metal hasp and carabiner on each end of our nest box door to keep it secure and snug enough to minimize drafts.

Find complete nest box building instructions and 20 more innovative projects for a hassle-free chicken habitat in Hentopia!
Text excerpted from Hentopia © 2023 by Frank Hyman.
From the Vending Machine Feeder to the Refilling Rainwaterer, Hyman’s innovative building projects are designed to save time and money while keeping chickens safe, healthy, clean, and well fed. Featuring easy-to-follow instructions and colorful photos, the 21 projects for the chicken yard range from creative doorways, nest boxes, fencing, and roosts to a predator-proof pen, a “Chunnel” chicken run, and a sturdy but inexpensive coop made from wooden pallets. With a lively, humorous voice, Hyman generously shares his expert advice on all aspects of chicken-keeping. Requiring minimal previous carpentry experience and using many salvaged or found materials, Hentopia is within reach of every aspiring chicken-keeper.


